vegan game day food

The Best Vegan Chili: A Three-Bean Pot That Gets Better Every Day

A great chili is one of cooking’s most honest achievements. It does not ask for complicated technique or expensive ingredients. It asks for time, patience, good spices, and the willingness to let it simmer until it becomes something greater than the sum of its parts. What you end up with — a deeply flavoured, slightly smoky, richly seasoned pot of beans and vegetables — is the kind of food that fills a kitchen with warmth and a table with contentment.

This three-bean vegan chili has become, without exaggeration, the most-requested recipe among everyone who has tried it. The combination of kidney beans, black beans, and pinto beans gives the chili a complexity of texture and flavour that single-bean versions lack. The spice blend is layered and deliberate. And the addition of dark chocolate — yes, chocolate — at the end is the detail that makes people ask the question.

“What is that flavour? What did you put in this?”

The answer is always worth seeing their faces when you tell them.

The Role of Each Ingredient

Before the recipe, a brief word on why certain ingredients are here:

Three beans: Different beans bring different textures. Kidney beans are firm and substantial. Black beans are softer and earthier. Pinto beans sit somewhere in between. Together, they create a chili with textural dimension.

Dark chocolate: A small amount of good-quality dark chocolate (70% or above) added at the end of cooking adds depth, a subtle bitterness, and a richness that is felt rather than tasted. It is a technique used across Mexican mole cuisine and works extraordinarily well in chili.

Coffee: Brewed black coffee, added during cooking, deepens the umami of the dish without imparting a discernible coffee flavour. It is optional but worth including.

Apple cider vinegar: Added at the very end of cooking, a tablespoon of vinegar brightens the entire pot and balances the richness of the beans and spices.

Ingredients (Serves 8)

  • 1 can (400g) kidney beans, drained and rinsed
  • 1 can (400g) black beans, drained and rinsed
  • 1 can (400g) pinto beans, drained and rinsed
  • 2 cans (800g) chopped tomatoes
  • 3 tablespoons tomato paste
  • 500ml vegetable stock
  • 100ml brewed black coffee (optional)
  • 2 large onions, finely diced
  • 6 garlic cloves, minced
  • 2 red bell peppers, diced
  • 2 stalks celery, diced
  • 1 jalapeño, finely diced (optional)
  • 3 tablespoons olive oil
  • 3 teaspoons ground cumin
  • 2 teaspoons smoked paprika
  • 2 teaspoons chilli powder
  • 1 teaspoon ground coriander
  • 1 teaspoon dried oregano
  • ½ teaspoon ground cinnamon
  • ½ teaspoon cayenne pepper (adjust to heat preference)
  • 30g dark chocolate (70%+), roughly chopped
  • 1 tablespoon apple cider vinegar
  • 1 tablespoon soy sauce
  • Salt and pepper to taste

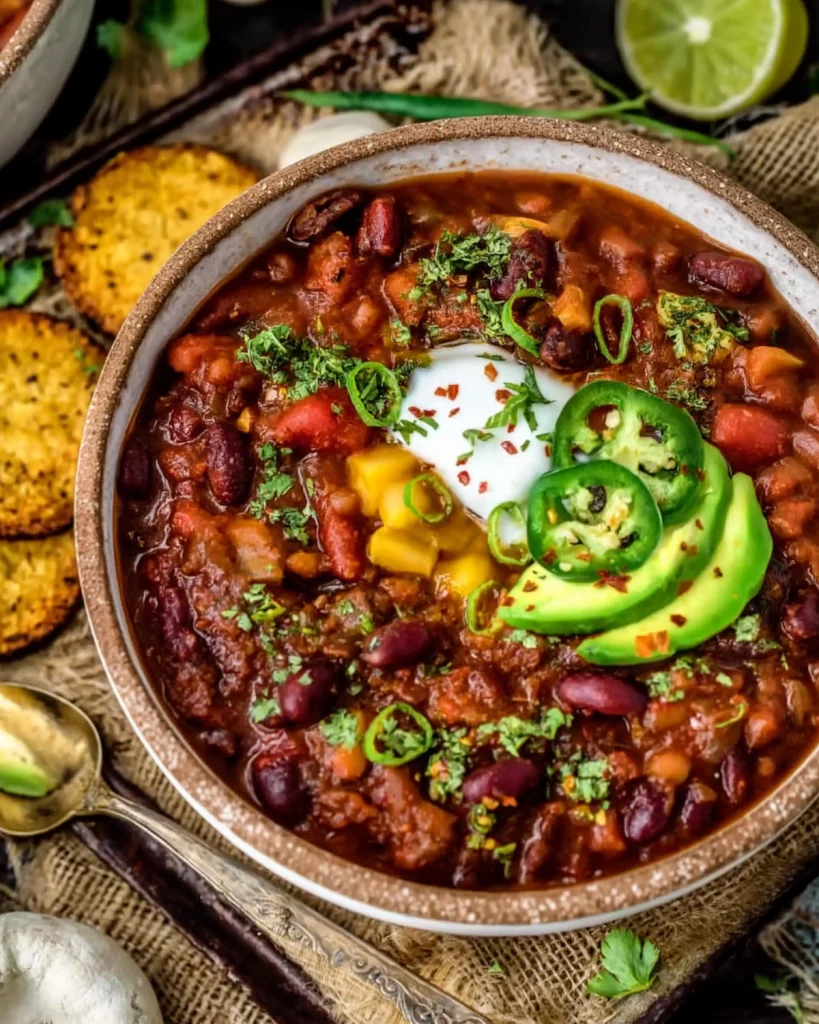
To serve: Steamed rice or cornbread, sliced avocado, vegan sour cream, fresh coriander, lime wedges, jalapeño slices

Method

Step 1: Build the Aromatics

Heat the olive oil in a large, heavy-bottomed pot over medium heat. Add the onions, celery, and red peppers with a good pinch of salt. Cook for 10 to 12 minutes, stirring occasionally, until the vegetables are soft and the onions are beginning to turn golden. Add the garlic and jalapeño (if using) and cook for two more minutes.

Step 2: Toast the Spices

Add all the dried spices: cumin, smoked paprika, chilli powder, ground coriander, oregano, cinnamon, and cayenne. Stir constantly for 90 seconds — the spices will become fragrant and the bottom of the pot may begin to darken slightly. This is the blooming step: it transforms the raw, slightly harsh flavour of dried spices into something rounded and complex.

Step 3: Add the Tomatoes and Liquids

Add the tomato paste and stir for two minutes to caramelise it. Pour in the chopped tomatoes, soy sauce, vegetable stock, and coffee if using. Stir well to scrape any caramelised bits from the bottom of the pot.

Step 4: Add the Beans and Simmer

Add all three types of drained beans. Stir to combine. Bring to a boil, then reduce to a low, steady simmer. Cook uncovered for 35 to 45 minutes, stirring occasionally, until the chili has thickened to your preferred consistency and the flavours have deepened significantly. A thick chili clings to a spoon; a thinner one flows. Both are correct — adjust the cooking time to preference.

Step 5: The Final Touches

Remove from heat. Add the chopped dark chocolate and stir until completely melted. Add the apple cider vinegar and stir. Taste carefully and season with salt and pepper. This final tasting and seasoning step is not optional — it transforms a good chili into a great one.

Step 6: Rest and Serve

Allow the chili to rest for 10 minutes before serving. This resting time allows the flavours to settle and the consistency to stabilise. Serve over steamed rice or with warm cornbread, topped with sliced avocado, fresh coriander, a squeeze of lime, and vegan sour cream.

Day Two is Better

I will make a direct recommendation: make this chili the day before you plan to serve it. The flavours of a chili — the interplay of spices, beans, tomato, and chocolate — continue to develop as it rests. A 24-hour-old chili is measurably better than a freshly made one. This makes it ideal for dinner parties, meal prepping, and any situation where you want excellent food with minimal same-day effort.

Storage and Freezing

Refrigerate in sealed containers for up to five days. Freeze in portions for up to four months. This is one of the best freezer meals you can make — it thaws and reheats beautifully, with no loss of flavour or texture.

Nutrition

This chili is genuinely one of the most nutritionally complete meals in this collection. Three varieties of beans provide a combined total of approximately 25 grams of protein per serving, along with extraordinary amounts of dietary fibre — approximately 20 grams per serving — iron, potassium, folate, and complex carbohydrates. The fibre content alone makes this one of the best gut-health meals you can eat.

Dark chocolate contributes flavanols — powerful antioxidants with established cardiovascular benefits — and adds iron. Tomatoes provide lycopene, and the bell peppers contribute more vitamin C per serving than most citrus fruits.

A Recipe Worth Keeping

Every cook should have one chili recipe that they know inside out — one that they can make from memory, adjust by instinct, and serve with confidence on any occasion. This is the recipe I would offer for that role.

Make it once, make it twice, and then make it yours.


Find more hearty plant-based meals in our Website.

Crispy Cauliflower Buffalo Wings: The Plant-Based Party Food Everyone Reaches For First

The first time I served these at a gathering, they were gone before I had the chance to sit down. That is the truest endorsement I can give any recipe: a table of people who were not expecting to be impressed, reaching for a second piece before they had finished the first.

Cauliflower buffalo wings have become something of a plant-based staple in recent years, and for good reason. When prepared correctly — battered, baked until crispy, then tossed in a tangy, spicy buffalo sauce — they deliver the satisfaction of game-day food with none of the meat. The exterior is crunchy. The interior is tender. The sauce is bold, buttery, and unmistakably buffalo.

The key distinction between good and exceptional cauliflower wings is the batter. A well-seasoned, slightly thick batter that adheres properly to the cauliflower and crisps in the oven makes all the difference. The method below produces consistently excellent results, and it requires no deep-frying.

Ingredients (Serves 4 as a starter, or 6 as a snack)

For the cauliflower:

  • 1 large head of cauliflower, cut into large florets
  • 120g plain flour (or chickpea flour for gluten-free)
  • 160ml unsweetened plant milk
  • 1 teaspoon garlic powder
  • 1 teaspoon onion powder
  • 1 teaspoon smoked paprika
  • ½ teaspoon salt
  • ½ teaspoon black pepper
  • 80g panko breadcrumbs

For the buffalo sauce:

  • 120ml hot sauce (Frank’s RedHot is the classic choice)
  • 3 tablespoons vegan butter
  • 1 tablespoon maple syrup
  • 1 teaspoon garlic powder
  • ½ teaspoon onion powder
  • A pinch of salt

For serving:

  • Vegan ranch or blue cheese dressing
  • Celery sticks and carrot sticks
  • Fresh parsley
  • Lemon wedges

Method

Step 1: Prepare

Preheat your oven to 220°C (200°C fan). Line two large baking trays with parchment and drizzle lightly with oil. A well-oiled tray is essential for crispiness.

Step 2: Make the Batter

In a large bowl, whisk together the flour, plant milk, garlic powder, onion powder, smoked paprika, salt, and pepper until smooth. The batter should be thick enough to coat a floret without running off — similar to a thick crêpe batter. If too thick, add a splash more milk. If too thin, add a little more flour.

Step 3: Coat the Cauliflower

Spread the panko breadcrumbs on a plate. Working with one floret at a time, dip it in the batter and allow the excess to drip off. Then roll it in the panko breadcrumbs, pressing gently to adhere. Place on the prepared baking tray. Repeat with all florets.

Spacing is important: leave at least 2cm between each wing. Overcrowding causes steaming rather than crisping.

Step 4: Bake

Bake for 20 minutes, then carefully flip each piece. Bake for a further 10 to 15 minutes until deeply golden and crisp. The panko should be a rich golden-brown colour.

Step 5: Make the Buffalo Sauce

While the cauliflower bakes, melt the vegan butter in a small saucepan over low heat. Add the hot sauce, maple syrup, garlic powder, onion powder, and salt. Whisk until emulsified and smooth. Taste — adjust the heat level with more hot sauce if desired, or add an extra teaspoon of maple syrup to soften it.

Step 6: Toss and Finish

Remove the baked cauliflower wings from the oven. Transfer to a large bowl and pour over the buffalo sauce. Toss gently to coat every piece thoroughly without breaking the crust. Return to the baking tray and bake for a final 5 minutes to set the sauce.

Step 7: Serve Immediately

Serve hot with vegan ranch dressing for dipping, celery sticks, and a squeeze of lemon. These are at their very best within 15 minutes of the final bake, while the coating is still at its crispiest.

Tips for Maximum Crispiness

Several factors determine the crispiness of the final result:

Dry the cauliflower: After washing and cutting the florets, dry them thoroughly with a clean tea towel before battering. Moisture on the surface dilutes the batter and compromises the crust.

Use panko breadcrumbs: Regular breadcrumbs create a denser, heavier coating. Panko — Japanese-style breadcrumbs — are lighter and produce a significantly crispier crust. They are widely available in most supermarkets.

Do not crowd the tray: As noted above, spacing matters. If you need to cook in batches, do so rather than piling everything onto one tray.

High heat: 220°C is hotter than most baked vegetable recipes. This high heat is intentional — it drives off moisture quickly and promotes caramelisation of the crust.

The Vegan Ranch Dressing

A great dipping sauce is as important as the wings themselves. For a quick vegan ranch, combine 150g of vegan mayonnaise with 60ml of unsweetened oat milk, one tablespoon of apple cider vinegar, half a teaspoon of garlic powder, half a teaspoon of onion powder, one tablespoon of fresh dill (or a teaspoon of dried), and salt and pepper to taste. Whisk together and refrigerate for at least 20 minutes before serving. It keeps in the refrigerator for up to a week.

Nutritional Value

Cauliflower is one of the most nutritionally versatile vegetables available. A single serving of these wings provides vitamin C, vitamin K, folate, and a meaningful amount of dietary fibre. The chickpea flour variation increases the protein content of the batter considerably and makes the recipe suitable for those avoiding gluten.

These are a party food, and they should be enjoyed as such — but they are a better choice than most alternatives, made from whole ingredients without any artificial additives or preservatives.

Make-Ahead Options

The battered, pre-baked cauliflower wings (before the sauce is applied) can be prepared and refrigerated for up to 24 hours. Simply complete steps 1 through 4, allow to cool, and refrigerate in a sealed container. When ready to serve, reheat at 220°C for 8 to 10 minutes, then toss with the freshly made buffalo sauce and complete step 6.

The buffalo sauce keeps for up to a week in the refrigerator and reheats easily in a saucepan.

Final Thoughts

What makes this recipe so reliably excellent is the contrast it offers — the heat of the buffalo sauce against the cooling ranch, the crunch of the coating against the tender cauliflower, the sweet-sour-spicy balance of the sauce itself. Every element earns its place.

Serve them at your next gathering and watch them disappear. Then share this recipe when people ask how you made them.


Discover more warming plant-based recipes in our Website.