May 5, 2026

Sticky Sriracha Maple Tofu Bowl: The Sweet-Spicy Vegan Recipe

Make creamy vegan cottage cheese at home using tofu, cashews, or almonds. The breakout Google food trend of 2026 — high-protein, dairy-free, and more versatile than you think.
Make creamy vegan cottage cheese at home using tofu, cashews, or almonds.

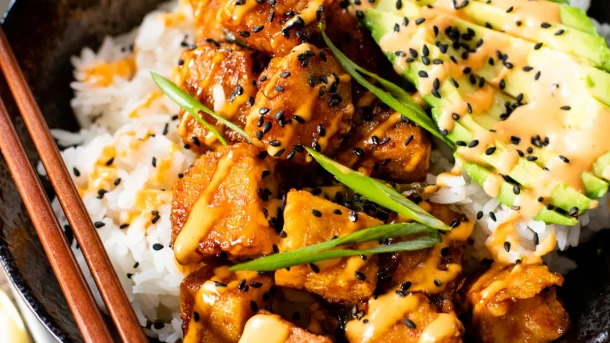
Combination of flavours sticky, sweet, spicy and with an edge of acidity. It is the reason sriracha honey chicken became a restaurant menu staple. It is the reason sweet chilli sauce has a permanent place in most refrigerators. And it is the reason this sriracha maple tofu bowl has spent months as one of the most saved recipes across Pinterest food boards.

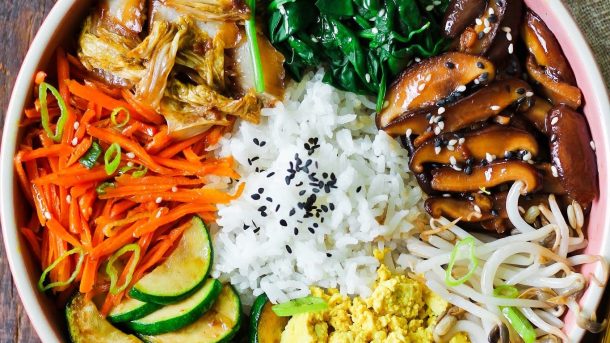
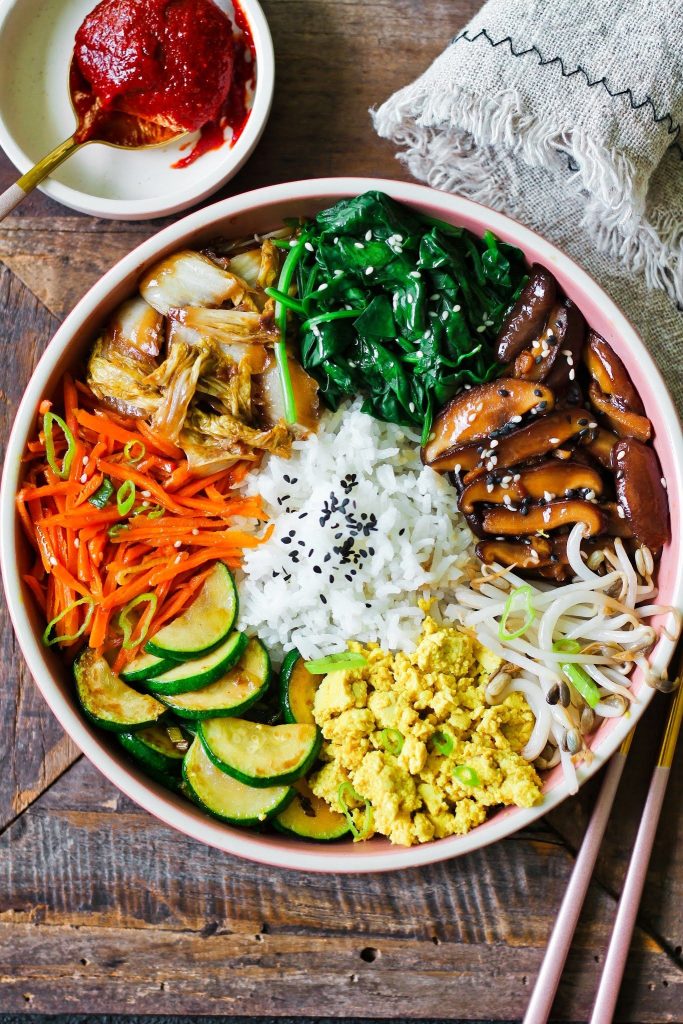
Served over coconut rice — which is fragrant, slightly sweet, and rich enough to balance the bold tofu — and finished with fresh cucumber, shredded carrot, avocado, sesame seeds, and coriander, this bowl is complete, balanced, and the kind of dinner that earns requests for repeats.

Why This Recipe Works as a Takeaway Alternative

The two main reasons people reach for takeaway are convenience and that specific quality of restaurant flavours — the boldness, the glaze, the richness — that feels difficult to replicate at home. This recipe addresses both.

The active cooking time is twenty minutes.Once you understand the method, it applies to almost any sauce. This sriracha maple version is a template.

On Pressing Tofu: Why It Is Not Optional

Every crispy tofu recipe includes the instruction to press the tofu, and it is the instruction most often skipped by people who are new to cooking with it. I want to be direct: pressing the tofu is the entire difference between this dish working and not working.

After pressing, tofu will develop a golden crust in hot oil in three to four minutes. Unpressed tofu will take much longer, brown unevenly, and potentially crumble hold its shape.

Ingredients (Serves 4)

Crispy tofu:

  • 400g -firm tofu, pressed for 30 minutes
  • 3 tablespoons cornstarch
  • 1 tablespoon soy sauce
  • 1 teaspoon garlic powder
  • 1 teaspoon smoked paprika
  • 2 tablespoons neutral oil (for frying)

Maple sauce:

  • 3 tablespoons sriracha (adjust to heat preference)
  • 3 tablespoons maple syrup
  • 2 tablespoons soy sauce or tamari
  • 1 tablespoon rice vinegar
  • 1 tablespoon sesame oil
  • 3 garlic cloves, very finely minced or grated
  • 1 teaspoon fresh ginger, grated
  • 1 teaspoon cornstarch (to thicken the sauce in the pan)
  • 2 tablespoons water

For the coconut rice:

  • 300g jasmine rice
  • 200ml full-fat coconut milk
  • 250ml water
  • ½ teaspoon salt
  • 1 teaspoon coconut sugar (optional)

For the bowl toppings:

  • 1 large cucumber, thinly sliced or diced
  • 2 medium carrots, grated or julienned
  • 1 ripe avocado, sliced
  • 4 spring onions, thinly sliced
  • 2 tablespoons toasted sesame seeds
  • A large handful of fresh coriander
  • 1 lime, quartered
  • Extra sriracha or chilli oil, to serve
  • Edamame (optional, for additional protein)

Method

Step 1: Cook the Coconut Rice

Rinse the jasmine rice the water runs clear. Combine the rinsed rice, coconut milk, water, and salt in a saucepan. Bring to a boil, stirring once. Reduce to the lowest possible heat, cover tightly, and cook for 15 minutes. Remove from heat and leave covered for 10 more minutes. Fluff with a fork — the rice will be fragrant, slightly sticky, and beautifully coconut-flavoured. Keep warm, covered.

Step 2: Make the Sriracha Maple Sauce

Whisk together sriracha, maple syrup, soy sauce, rice vinegar, sesame oil, garlic, ginger, cornstarch, and water in a small bowl. The sauce will look thin — the cornstarch will thicken it considerably and it hits the hot pan. Taste and adjust the sriracha level to your preferred heat.

Step 3: Prepare the Tofu

Cut the pressed tofu into cubes (approximately 2cm) or rectangles. Toss with the tablespoon of soy sauce, garlic powder, and smoked paprika. Spread the cornstarch on a plate and roll each piece of tofu to coat thoroughly — get into all the edges and surfaces. The cornstarch coating should be thin and complete.

Step 4: Fry the Tofu

Heat the neutral oil in a wide, non-stick or cast-iron pan over high heat. You want the oil genuinely hot — a small piece of tofu dropped in should sizzle immediately and vigorously. Add the tofu in a single layer, working in batches. Do not touch it for three to four minutes. it’s underside is deeply golden, turn each piece. Cook for two to three minutes on the second side. Remove from the pan and set aside on a plate.

Step 5: Make the Sauce in the Pan

In the same pan, reduce the heat to medium. Pour in the sriracha maple sauce. It will bubble immediately and thicken quickly from the corn-starch — stir constantly for 60 to 90 seconds the sauce coats the back of a spoon thickly. Add the fried tofu back to the pan and toss vigorously to coat every piece. The sauce should cling and caramelise slightly around each piece. Remove from heat immediately.

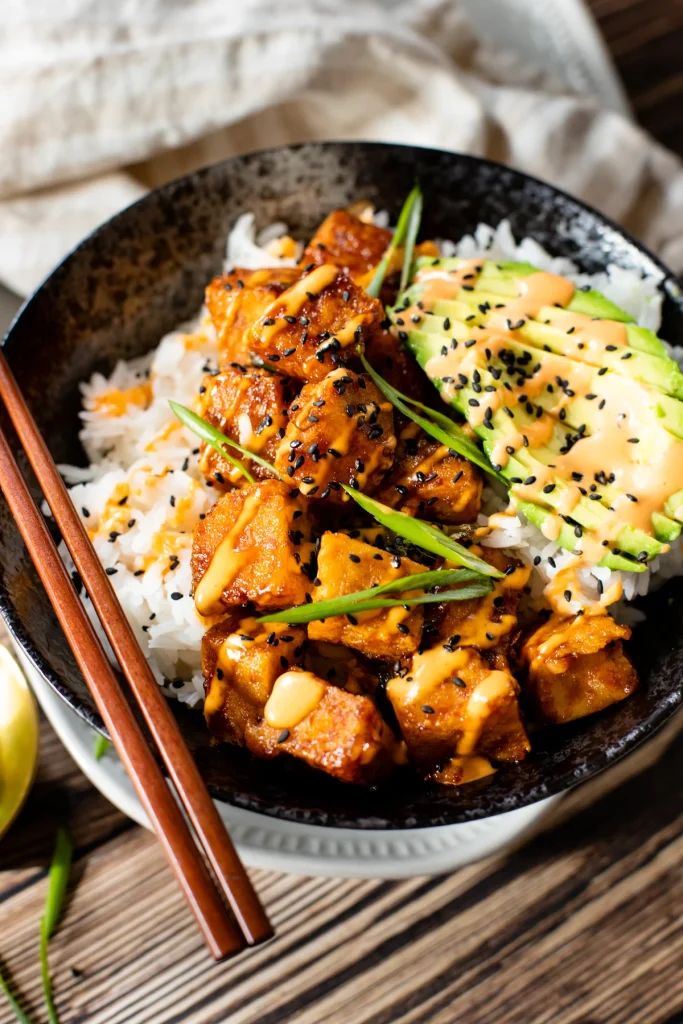
Step 6: Assemble the Bowls

Divide the coconut rice between four bowls. Pile the glazed tofu over the rice. Arrange the cucumber, grated carrot, sliced avocado, and edamame around the tofu. Scatter spring onions, sesame seeds, and coriander generously over everything. Add a lime wedge to each bowl.

Finish with an extra drizzle of sriracha or chilli oil for those who want more heat.

Making the Sauce Your Own

The sriracha maple sauce is a template, not a fixed formula. Once you understand the ratio — heat, sweet, salty, acidic — you can vary each element:

Gochujang maple: Replace sriracha with gochujang for a deeper, more fermented heat with less sharpness.

Mango sriracha: Add two tablespoons of mango purée to the sauce for a fruity-spicy-sweet variation that works beautifully in summer.

Peanut sriracha: Add one tablespoon of peanut butter to the sauce for richness and a nutty undertone.

Teriyaki style: Replace sriracha entirely with mirin and a little extra soy sauce for a sweet, mild, more traditional Japanese glaze.

Nutritional Value

This bowl is nutritionally complete in a way that rivals most structured meal plans. Tofu provides complete plant protein — approximately 18 grams per serving. Coconut rice supplies complex carbohydrates for sustained energy. Avocado contributes monounsaturated fats, potassium, and folate. Carrots provide beta-carotene. Cucumber contributes hydration and vitamin K. Edamame adds additional protein and fibre.

Sriracha contains capsaicin — associated with improved metabolism and anti-inflammatory effects in research — and garlic provides allicin, a compound with established antimicrobial and cardiovascular benefits.

This is a bowl that makes you feel as good as it tastes.

Meal Prep Notes

The components of this bowl are ideal for meal prep:

  • Cook a large batch of coconut rice at the start of the week. It keeps refrigerated for four days and reheats with a splash of water.
  • Press, cut, and coat the tofu with cornstarch up to 24 hours in advance. Store uncovered in the refrigerator the surface dries and produces an crispier crust.
  • Make the sauce in advance and refrigerate in a jar for up to a week.
  • Chop the vegetables and store in separate containers.

Assembly on any given evening takes five minutes.

Final Thoughts

What makes this bowl the kind of recipe that ends up saved, shared, and made repeatedly is the fact that it delivers restaurant-quality flavour through a home-cook-accessible technique. There is no specialist equipment, no obscure ingredient, and no technical skill that cannot be learned in the first attempt.

Make it once. Make it your own.


Find more trending plant-based bowl recipes and easy vegan dinners in our Website.

Vegan Cottage Cheese: How to Make the Breakout Food Trend of 2026 at Home (3 Ways)

This vegan pho recipe has a deeply fragrant, star anise-spiced broth and all the classic toppings — made entirely plant-based. The ultimate Vietnamese noodle soup recipe for healthy, soul-warming vegan dinners.

Sometimes a trend arrives so quietly that you almost miss it. There were no celebrity endorsements, no supermarket launches, no food media campaigns. Just thousands of people, independently and almost simultaneously, typing the same question into their search bars: “how do I make vegan cottage cheese?”

According to Google Trends analysis, vegan cottage cheese became one of the fastest-growing food search terms of 2025, continuing strongly into 2026. The interest was not driven by a single viral post or a notable product launch. It was driven by something more interesting: a genuine curiosity, widely shared, about whether the mild, creamy, high-protein versatility of cottage cheese could be replicated without dairy.

The answer, as this recipe demonstrates in three different ways, is a convincing yes.

Why Cottage Cheese Has Become the Ingredient of the Moment

Traditional cottage cheese experienced a significant cultural renaissance in 2024 and 2025, driven largely by the high-protein eating trend and the cottage cheese pancake and cottage cheese bowl content that flooded TikTok and Pinterest. For dairy eaters, it offered a high-protein, relatively low-fat food with mild flavour and remarkable versatility — usable in sweet and savoury contexts alike.

For plant-based eaters watching this trend from the sidelines, the question was natural: can I have this too?

Vegan cottage cheese is not a new idea — it has existed in whole-food plant-based cooking for years. But the sudden mainstream interest brought new creativity to the concept, and the versions that emerged from that creative pressure are genuinely excellent.

Three Versions of Vegan Cottage Cheese

This recipe presents three distinct approaches, each with different base ingredients, different textures, and different nutritional profiles. Choose based on what you have available, what you plan to use it for, and your own preferences.


Version 1: Tofu Cottage Cheese (Best for High Protein, Savory Uses)

This is the most nutritionally impressive version and the most convincing in terms of texture. Crumbled firm tofu has a natural lumpiness that closely mimics the curds of dairy cottage cheese.

Ingredients:

  • 400g firm tofu, drained (not pressed — you want it slightly moist)
  • 200g silken tofu
  • 2 tablespoons lemon juice
  • 1 tablespoon apple cider vinegar
  • 1 tablespoon nutritional yeast
  • 1 teaspoon onion powder
  • ½ teaspoon garlic powder
  • ½ teaspoon salt, or more to taste
  • 2 tablespoons unsweetened oat milk or plant milk (to adjust consistency)
  • Fresh chives, finely chopped (optional)

Method: Blend the silken tofu with the lemon juice, apple cider vinegar, nutritional yeast, onion powder, garlic powder, and salt until completely smooth — this forms the creamy base.

Crumble the firm tofu into the blended base using your hands, breaking it into irregular pieces of varying sizes — some small, some slightly larger — that mimic the curd structure of dairy cottage cheese. Do not blend again; fold gently with a spatula. Add the plant milk to reach your desired consistency. Fold in the chives if using. Taste and adjust salt and acid.

Refrigerate for at least one hour before serving — the flavours develop considerably, and the texture sets in a way that improves the overall result.

Protein per serving (½ cup): approximately 12–14 grams


Version 2: Cashew Cottage Cheese (Best for Creamy, Sweet Uses)

This version is richer, creamier, and more indulgent. The cashew base produces a texture closer to ricotta than cottage cheese, but it works beautifully in sweet contexts — on toast with fruit, in parfaits, in baking.

Ingredients:

  • 200g raw cashews, soaked for at least four hours, drained
  • 2 tablespoons lemon juice
  • 1 tablespoon apple cider vinegar
  • 1 tablespoon maple syrup (for sweet uses) or omit for savoury
  • ½ teaspoon salt
  • 60–80ml water
  • 100g silken tofu (optional, to add protein and lighten the texture)

Method: Blend all ingredients except the water until almost smooth. Add water, one tablespoon at a time, until you reach a thick, scoopable consistency. For a cottage-cheese-style texture, pulse rather than blend fully — leaving some slight texture.

Refrigerate for one hour before using. This version will keep for up to five days in a sealed jar.

Uses: Toast with sliced peach and honey alternative, layered in parfaits with granola and berries, as a filling for blintzes, in cheesecake as a ricotta substitute.


Version 3: Almond Cottage Cheese (Best for Budget-Friendly, Everyday Use)

Blanched almonds, soaked and blended with a cultured element, produce a mild, slightly textured cottage cheese alternative that is more affordable than cashews and works well in most savoury applications.

Ingredients:

  • 200g blanched almonds, soaked for 8 hours or overnight, drained
  • 2 tablespoons lemon juice
  • 1 tablespoon apple cider vinegar
  • 1 tablespoon vegan plain yoghurt (adds a cultured, tangy note)
  • ½ teaspoon salt
  • 1 teaspoon onion powder
  • 80–100ml water

Method: Blend all ingredients, starting with 80ml of water. Blend until smooth but slightly grainy — almonds will never achieve the silkiness of cashews, and that slight texture works in favour of the cottage cheese illusion. Adjust salt and acid. Refrigerate for at least two hours before using.


10 Ways to Use Vegan Cottage Cheese

Once you have a jar in the refrigerator, here is how to use it:

  1. On toast: With sliced avocado and everything bagel seasoning for a savoury breakfast.
  2. In a bowl: With fresh berries, a drizzle of maple syrup, and granola for a high-protein sweet breakfast.
  3. In pancakes: Fold into pancake batter for extra moisture and protein — the mildness works perfectly.
  4. As a dip: Season the tofu version with fresh herbs, garlic, and lemon zest for a vegetable dip.
  5. Stuffed pasta filling: Use in place of ricotta in stuffed shells or lasagne.
  6. In salad dressing: Blend with lemon juice, olive oil, and herbs for a creamy, protein-rich dressing.
  7. On baked potatoes: As a healthier alternative to sour cream or butter.
  8. In smoothies: A few tablespoons in a protein smoothie adds creaminess and protein without affecting flavour.
  9. With cucumber and dill: Sliced cucumber, fresh dill, and a squeeze of lemon — a simple, elegant snack.
  10. As a cheesecake base: The cashew version works beautifully as the filling for a no-bake vegan cheesecake.

The Nutritional Case for Vegan Cottage Cheese

Traditional dairy cottage cheese has long been celebrated for its high protein-to-calorie ratio. The tofu-based version holds up well in comparison. Per half-cup serving:

  • Tofu cottage cheese: ~12–14g protein, ~100 calories, high iron and calcium
  • Dairy cottage cheese: ~14g protein, ~110 calories
  • Cashew cottage cheese: ~5g protein, ~180 calories (higher in healthy fats)

The tofu version also provides isoflavones — phytoestrogens with demonstrated benefits for bone health and cardiovascular health in research contexts — along with calcium (particularly if made with calcium-set tofu), iron, and all essential amino acids.

The cashew and almond versions are lower in protein but higher in heart-healthy monounsaturated fats and vitamin E.

Storage

All three versions keep in a sealed jar in the refrigerator for four to five days. They do not freeze well — the texture suffers on thawing. Make smaller batches more frequently for the freshest result.

Final Thoughts

The vegan cottage cheese trend is worth paying attention to — not because it is particularly glamorous, but because it solves a real practical problem for plant-based eaters: the need for a mild, creamy, high-protein food that works across contexts and occasions, that requires no cooking, and that keeps conveniently in the refrigerator for several days.

Make the tofu version first. Use it on toast tomorrow morning. See how quickly the jar empties.


Find more trending high-protein vegan recipes and plant-based kitchen staples in our Website.

Vegan Pho Recipe: Fragrant Vietnamese Noodle Soup With a Broth

Make an authentic vegan bibimbap bowl at home with crispy tofu, rainbow vegetables, and homemade gochujang sauce. The trending Korean plant-based recipe everyone is making in 2026.

Pho is perhaps the most perfectly composed soup in the world. Not the most complex — there are broths that take longer, ingredients that are rarer, techniques that are more demanding. But in terms of the relationship between its elements — the clarity of the broth, the freshness of the herbs, the heat of the chilli, the give of the noodles, the depth of the aromatics — it achieves a balance that is almost mathematical in its precision.

Traditional pho is built on a beef bone broth simmered for hours with charred ginger and onion, star anise, cloves, cinnamon, and cardamom. The result is a broth of extraordinary fragrance and depth. The plant-based version presented here does not try to pretend that process away — instead, it replicates the flavour logic using roasted vegetables and dried mushrooms in place of bones, and the same charred aromatics and spice blend that give authentic pho its unmistakeable, warming fragrance.

The result is a vegan broth so good that it has become one of the most pinned and saved recipes across every major platform in 2025 and 2026. People who have eaten real pho in Hanoi find it convincing. People who are making pho for the first time find it manageable. It serves both audiences equally well.

The Key to the Broth: Charring the Aromatics

The step that most home cooks skip — and the step that most distinguishes authentic pho broth from an approximation — is the direct charring of the ginger and onion before they go into the pot.

Halve the ginger lengthways and the onion crossways. Place them cut-side down directly on a gas flame, under a hot grill, or in a dry cast-iron pan over maximum heat. Cook until the cut surfaces are deeply blackened — not lightly browned, but actually burnt. This char does two things: it removes the raw bite of the aromatics and replaces it with a deep, caramelised sweetness, and it contributes a subtle smokiness to the broth that is one of pho’s most characteristic background notes.

Do not be afraid of the blackening. It is correct and intentional.

Ingredients (Serves 4)

For the vegan pho broth:

  • 3 litres cold water
  • 20g dried shiitake mushrooms
  • 10g dried porcini mushrooms
  • 10g kombu seaweed
  • 3 medium onions, halved crossways
  • 8cm piece fresh ginger, halved lengthways
  • 1 large head of garlic, halved crossways
  • 2 medium carrots, roughly chopped
  • 3 stalks celery, roughly chopped
  • 3 tablespoons soy sauce or tamari
  • 2 tablespoons vegan fish sauce or additional soy sauce
  • 1 tablespoon dark soy sauce (for colour)
  • 1 tablespoon coconut sugar or brown sugar

The spice sachet (tie in muslin or use a tea infuser):

  • 4 star anise
  • 1 cinnamon stick (7cm)
  • 4 whole cloves
  • 3 cardamom pods, lightly crushed
  • 1 teaspoon black peppercorns
  • 1 teaspoon coriander seeds

For the bowl:

  • 400g flat rice noodles (bánh phở)
  • 300g extra-firm tofu, pressed and thinly sliced, pan-fried until golden
  • 200g baby bok choy, halved
  • 100g bean sprouts

For the table (traditional pho garnishes):

  • A large bunch of fresh Thai basil
  • A large bunch of fresh coriander
  • 2 fresh red chillies, thinly sliced
  • 2 limes, quartered
  • Hoisin sauce, to serve
  • Sriracha or chilli oil, to serve
  • Extra bean sprouts

Method

Step 1: Char the Aromatics

Place the halved onions, ginger, and garlic directly over a gas flame, under a grill on maximum heat, or in a very hot dry cast-iron pan. Cook until deeply charred on the cut surfaces — 3 to 5 minutes. Turn and char the skin side for another minute. The surfaces should be genuinely black, not just dark. Transfer to the soup pot.

Step 2: Build the Broth

In a large pot, combine the charred aromatics with the dried shiitake, porcini, and kombu. Add the carrots, celery, and 3 litres of cold water. Bring to a boil, then reduce to a low simmer. Skim any foam that rises in the first five minutes.

Add the spice sachet. Simmer gently, uncovered, for at least one hour — two hours produces a deeper, more developed broth. The kitchen will fill with one of the most extraordinary aromas imaginable.

Step 3: Strain and Season

Strain the broth through a fine-mesh sieve into a clean pot, discarding all solids (you can squeeze the mushrooms first to extract maximum flavour). The broth should be clear, amber-brown, and deeply fragrant.

Add the soy sauce, dark soy sauce, vegan fish sauce, and coconut sugar. Taste carefully and adjust — it should be savoury, slightly sweet, deeply aromatic, and clear in flavour. If it tastes flat, add a little more soy sauce. If it tastes too salty, add a splash of water.

Step 4: Prepare the Toppings

While the broth simmers, prepare the bowl elements. Pan-fry the sliced tofu in a little neutral oil until golden on both sides. Briefly blanch the bok choy in the simmering broth for 60 seconds, then remove. Cook the rice noodles according to packet instructions, drain, and rinse.

Step 5: Assemble

Warm your bowls. Divide the noodles between the bowls — they should fill about a third of the bowl. Arrange the tofu, bok choy, and bean sprouts over the noodles. Ladle the very hot broth over everything — it should fill the bowl and just cover the noodles. The heat of the broth will warm every component in the bowl.

Step 6: Serve with the Full Garnish Spread

Bring everything to the table at once: Thai basil, coriander, sliced chilli, lime wedges, hoisin sauce, and sriracha. Each person customises their bowl — this interactive element is part of what makes pho such a communal, enjoyable eating experience.

Squeeze lime over the broth before eating. Add basil and coriander directly into the bowl, allowing them to wilt slightly from the heat. Add chilli and hoisin to taste. Mix everything gently before eating.

The Patience Investment

I want to be clear: the broth takes time. One hour minimum, two hours for the best result. This is not an everyday weeknight recipe — it is a weekend project, a Sunday endeavour, a cooking meditation.

But the reward is proportional. The broth you produce after two hours of slow simmering is something you will not find in a packet or a store, and it will make every bowl of soup you serve remarkable.

Make a large batch — six to eight litres — and freeze it in portions. You will have vegan pho broth on hand for months, and each bowl thereafter takes less than fifteen minutes.

Nutrition

This soup is one of the most complete nutritional packages in Vietnamese cuisine. The broth, made with dried shiitake and kombu, is rich in iodine, B vitamins, and umami amino acids. Tofu provides complete plant protein. Bok choy delivers calcium, vitamin C, and folate. Bean sprouts are a source of vitamin C and easily digestible protein. Fresh Thai basil and coriander provide vitamin K and antioxidant compounds.

Rice noodles are naturally gluten-free and easy on digestion, making this a bowl that is both nourishing and gentle.

Final Thoughts

Pho is a dish with soul. It carries the flavours of an entire culture in a single bowl — the warmth of star anise, the fragrance of fresh herbs, the deep satisfaction of a long-simmered broth. Making it plant-based does not diminish any of that. It simply changes the source of the depth from bones to earth, and the result is no less extraordinary for the change.

Make it on a cold weekend. Set the table properly. Eat slowly.


Discover more warming international plant-based recipes in our Website.

Vegan Korean Bibimbap Bowl: The K-Food Trend

Korean food has been having a global moment, and that moment shows no signs of slowing down. Driven in part by the worldwide reach of K-pop culture and in part by the extraordinary quality of the cuisine itself, Korean food has moved from niche to mainstream in kitchens across the globe. And at the centre of that movement — perhaps the most searched, most pinned, and most recreated Korean dish outside of Korea — is bibimbap.

Bibimbap translates roughly as “mixed rice.” But that translation undersells it considerably. What it actually describes is one of the most elegant and satisfying rice dishes in any food culture: a bowl of warm rice topped with a rainbow of individually prepared vegetables, protein, a fried egg (or in this version, crispy tofu), and a dramatic drizzle of gochujang — a sweet-spicy fermented chilli paste that ties everything together in a way that produces genuine, repeated flavour revelations with each bite.

This plant-based version is completely authentic in spirit, deeply flavourful, and more achievable at home than it first appears. The components can be prepared in stages, and several can be made days in advance. It is a Sunday meal prep dream.

Understanding the Structure of Bibimbap

What makes bibimbap remarkable as a dish is its modularity. Unlike most bowl recipes where ingredients are combined and cooked together, bibimbap places each topping separately — which means each component retains its own distinct character, and the eater chooses how to mix them in each bite. You control the ratio. You decide when to stir the gochujang through. The bowl evolves from first bite to last.

The traditional components of a Korean bibimbap include: rice (always short-grain, always warm), namul (seasoned and sautéed vegetables), protein (egg or meat, here replaced with tofu), gochujang sauce, and sesame oil. Each namul is prepared individually — this is the most labour-intensive element, but it is also what gives the dish its textural and flavour range.

Ingredients (Serves 4)

For the crispy gochujang tofu:

  • 400g extra-firm tofu, pressed for at least 30 minutes
  • 2 tablespoons gochujang (Korean fermented chilli paste — check it is vegan)
  • 1 tablespoon soy sauce
  • 1 tablespoon maple syrup
  • 1 tablespoon sesame oil
  • 1 tablespoon rice vinegar
  • 2 garlic cloves, grated
  • 1 tablespoon cornstarch
  • 1 tablespoon neutral oil (for pan-frying)

For the bibimbap sauce:

  • 3 tablespoons gochujang
  • 2 tablespoons sesame oil
  • 1 tablespoon soy sauce
  • 1 tablespoon maple syrup or rice syrup
  • 1 tablespoon rice vinegar
  • 2 garlic cloves, grated
  • 1 teaspoon toasted sesame seeds
  • 2 tablespoons water (to loosen)

For the namul (seasoned vegetables) — prepare individually:

  • 200g baby spinach
  • 200g bean sprouts
  • 2 medium zucchini (courgettes), julienned
  • 2 medium carrots, julienned
  • 200g shiitake mushrooms, thinly sliced
  • Soy sauce, sesame oil, garlic, sesame seeds (for seasoning each namul)

For the bowl:

  • 400g short-grain white rice (or brown rice), cooked
  • 4 tablespoons toasted sesame seeds
  • 4 spring onions, thinly sliced
  • Kimchi (vegan version, optional but excellent)
  • Toasted nori, crumbled

Method

Step 1: Marinate and Cook the Tofu

Cut the pressed tofu into rectangles approximately 1cm thick. Combine gochujang, soy sauce, maple syrup, sesame oil, rice vinegar, and garlic in a bowl. Add the tofu and toss to coat. Marinate for at least 20 minutes (or overnight in the refrigerator for deeper flavour).

Dust the marinated tofu lightly with cornstarch. Heat neutral oil in a non-stick pan over high heat. Cook the tofu for three to four minutes per side until deeply caramelised and sticky. Set aside.

Step 2: Make the Bibimbap Sauce

Whisk together all sauce ingredients in a small bowl. Taste — it should be bold, spicy, sweet, and slightly sour. Adjust as desired. This sauce is powerful; a little goes a long way.

Step 3: Prepare the Namul

Each vegetable is seasoned and cooked separately. The standard seasoning for each is the same: a splash of soy sauce, a drizzle of sesame oil, a small amount of minced garlic, and sesame seeds. Adjust quantities to taste.

Spinach namul: Blanch the spinach in boiling water for 30 seconds. Drain, rinse with cold water, and squeeze firmly to remove all excess moisture. Season with soy sauce, sesame oil, a little garlic, and sesame seeds. Shape into a small mound and set aside.

Bean sprout namul: Blanch bean sprouts for two minutes. Drain, rinse, squeeze. Season identically to the spinach.

Zucchini namul: Sauté julienned zucchini in a little sesame oil over high heat for two to three minutes. Season with soy sauce and a pinch of salt.

Carrot namul: Sauté julienned carrot in a little sesame oil for three minutes until slightly softened but still holding texture. Season with soy sauce.

Shiitake mushroom namul: Sauté the sliced shiitake in sesame oil over medium-high heat for four to five minutes until golden. Add soy sauce and a little garlic. Cook for one more minute.

Step 4: Cook the Rice

Rinse the rice until the water runs clear. Cook using the absorption method: combine rinsed rice with water in a ratio of 1:1.2. Bring to a boil, cover, reduce to the lowest heat, and cook for 12 minutes. Remove from heat and steam, covered, for ten more minutes. Fluff gently with a fork.

Step 5: Assemble the Bibimbap

Use warmed bowls for the best result. Place a generous portion of rice in the centre of each bowl. Arrange the five namul in separate sections around the rice — the aesthetic arrangement is part of the tradition, with the different colours creating a rainbow effect. Place the crispy tofu in the centre or to one side. Add a spoonful of kimchi if using. Drizzle a generous tablespoon of bibimbap sauce over everything.

Sprinkle with toasted sesame seeds, spring onions, and crumbled nori. Serve with additional sauce on the side.

Step 6: Mix

This is the crucial and joyful step. At the table, mix everything together thoroughly — the rice, the vegetables, the tofu, the sauce. The act of mixing is both practical (distributing the sauce evenly) and characteristic (bibimbap means mixed rice). The bowl transforms completely when combined, and the flavours marry in a way that the separate components cannot achieve alone.

Make-Ahead and Meal Prep

Bibimbap is an outstanding meal prep recipe. The namul keep well in the refrigerator for three to four days in separate containers. The tofu can be cooked and refrigerated for up to three days. The sauce keeps for up to two weeks. When ready to eat, simply cook fresh rice and assemble — the meal comes together in five minutes.

This makes bibimbap one of the most practical healthy vegan meal prep recipes for the working week.

Nutrition

The nutritional range of a bibimbap bowl is extraordinary. Short-grain rice provides complex carbohydrates and energy. Tofu delivers complete plant protein. The five vegetable namul together contribute vitamins A, C, and K, iron, calcium, folate, and a range of phytonutrients and antioxidants. Sesame oil provides healthy monounsaturated fats and sesamin — a lignan with anti-inflammatory properties.

Gochujang contributes capsaicin — the compound responsible for chilli heat — which has been associated with improved metabolism and circulation in several research contexts. It is also naturally probiotic (the paste is fermented) and a source of vitamins B and C.

This bowl genuinely earns the description of a complete, balanced meal.

A Final Note on Gochujang

If you have never cooked with gochujang before, this recipe is the ideal introduction. It is one of the most versatile fermented condiments in any world cuisine — sticky, mildly spicy, complex, and slightly sweet. It works as a marinade, a glaze, a sauce base, and a condiment. Once you have a jar in your refrigerator, you will find uses for it constantly.

Buy a good-quality version (Korean-made is preferable) and check that it contains no fish sauce or shrimp paste for a fully vegan product — most standard versions are vegan, but it is worth verifying the label.


Explore more trending Korean-inspired plant-based recipes in our Website.

Tuscan White Bean and Kale Soup | Famous Vegan Comfort Bowl

This Tuscan white bean and kale soup is Pinterest's most-saved vegan soup recipe. One pot, 35 minutes, deeply nourishing and Italian-inspired. The best easy vegan dinner for cold nights.

There are recipes that belong to a season. And then there are recipes that belong to a feeling — the particular warmth of a kitchen on a cold evening, the smell of garlic and rosemary in olive oil, the quiet satisfaction of a bowl of soup that is somehow exactly what you needed without knowing you needed it. This Tuscan white bean and kale soup is the second kind.

The Italian Tradition Behind This Recipe

Ribollita — which translates roughly as “reboiled” — is the Tuscan peasant soup that forms the ancestral basis of this recipe. Traditionally made from leftover minestrone reboiled the following day with stale bread stirred through, it is the original waste-not cuisine: humble, thrifty, and unassumingly extraordinary.

This version draws from ribollita’s flavour architecture without its complexity or time investment. It borrows the white beans, the cavolo nero, the aromatics, and the slow-simmer instinct from the original and produces a soup that is ready in under forty minutes.

The bread is still welcome. It is encouraged.

Why Cannellini Beans Are the Right Choice

White beans — and specifically cannellini beans — have a quality that most other beans lack: they break down beautifully under low heat, releasing starch into the surrounding liquid that thickens the soup naturally without any added cream or flour. Pressing a small portion of the beans before adding them to the pot accelerates this process, producing a broth that is rich and almost creamy while remaining entirely whole-food.

Butter beans are an excellent alternative — their larger, creamier texture creates a slightly more indulgent result. Great Northern beans work well too. Avoid chickpeas in this recipe — their firmer texture and more assertive flavour disrupts the gentle, creamy balance the soup depends on.

Ingredients (Serves 6)

  • 3 cans (1.2kg) cannellini beans, drained (reserve the liquid from one can)
  • 200g cavolo nero (Tuscan kale) or regular curly kale, ribs removed, roughly chopped
  • 1 can (400g) chopped tomatoes
  • 1.2 litres good-quality vegetable stock
  • 1 large onion, finely diced
  • 6 garlic cloves, thinly sliced (not minced — sliced garlic behaves differently in oil)
  • 3 stalks celery, diced
  • 2 medium carrots, diced
  • 4 tablespoons good-quality extra-virgin olive oil, plus more to serve
  • 2 sprigs fresh rosemary
  • 3 sprigs fresh thyme
  • 1 bay leaf
  • 1 Parmesan rind (if not keeping fully vegan — adds extraordinary depth) or 3 tablespoons nutritional yeast
  • ½ teaspoon chilli flakes
  • 1 tablespoon white wine vinegar or lemon juice (to brighten at the end)
  • Salt and black pepper

To serve:

  • Thick-cut crusty bread or sourdough, toasted
  • Additional extra-virgin olive oil
  • Nutritional yeast or vegan Parmesan
  • Fresh flat-leaf parsley
  • Chilli flakes

Method

Step 1: Build the Soffritto

In a large, heavy-bottomed pot, heat the olive oil over medium-low heat. Add the onion, celery, and carrots with a generous pinch of salt. This is the soffritto — the Italian aromatic base that underpins the flavour of the entire soup. Cook slowly for 12 to 15 minutes, stirring occasionally, until the vegetables are completely soft, translucent, and beginning to turn golden. Do not rush this. The long, slow cooking sweetens the onion and concentrates the base.

Add the sliced garlic, rosemary, thyme, chilli flakes, and bay leaf. Cook for two more minutes until the garlic is fragrant and just beginning to colour.

Step 2: Add the Tomatoes

Add the chopped tomatoes and stir well. Increase the heat slightly and cook for five minutes, allowing the tomatoes to reduce and deepen in colour. This step removes the raw tomato edge and concentrates the umami.

Step 3: Prepare and Add the Beans

Drain two cans of beans and add them to the pot. With the back of a wooden spoon or a potato masher, press roughly one-third of the beans directly in the pot — this releases their starch and begins to build the creamy consistency. Drain the third can and add the beans whole. Pour the reserved bean liquid from one can into the soup — it adds body and flavour.

Add the vegetable stock and the Parmesan rind or nutritional yeast. Stir well.

Step 4: Simmer

Remove the Parmesan rind (if using), the rosemary and thyme sprigs, and the bay leaf.

Step 5: Add the Kale

Add the chopped kale in large handfuls, stirring after each addition. It will reduce dramatically in volume within seconds of hitting the hot broth. Simmer for five more minutes until the kale is completely wilted and tender but still a deep, vivid green.

Step 6: Finish and Serve

Add the white wine vinegar or lemon juice and stir. This final acidity is important — it brightens every flavour in the soup and lifts it from comforting to exceptional. Taste and season generously with salt and black pepper.

Ladle into deep bowls. Add a generous drizzle of good extra-virgin olive oil over the surface of each bowl — this is not optional. It is the Italian way, and it matters enormously to the final flavour. Scatter fresh parsley, chilli flakes, and nutritional yeast or vegan Parmesan. Serve with thick slices of toasted bread for dipping.

The Day-Two Phenomenon

This soup is excellent on the day it is made. It is transcendent on the second day. As it sits overnight, the beans continue to break down, the kale softens further, and the flavours from the rosemary and thyme permeate the entire pot in a way that active cooking cannot replicate. This is the ribollita principle: the best version of this soup is always the reboiled one.

Make a large batch intentionally. Reheat it the next day with a splash of water and eat it again. You will be glad you did.

Nutrition: Why This Soup Deserves Its Superfood Status

Cannellini beans are one of the most impressive nutritional packages in plant-based cooking: a single cup provides 17 grams of protein, 11 grams of dietary fibre, and very high levels of folate, iron, magnesium, and potassium. They are genuinely filling — the combination of protein and fibre produces sustained satiety that processed foods cannot match.

Cavolo nero (Tuscan kale) is arguably the most nutrient-dense leafy green available. It provides exceptional amounts of vitamins K, A, and C, along with calcium, iron, and glucosinolates — compounds with demonstrated protective effects against cellular damage. It also contains lutein and zeaxanthin, carotenoids that support long-term eye health.

Olive oil — used generously in both the cooking and serving of this soup — contributes oleocanthal, a compound with anti-inflammatory properties comparable in mechanism to ibuprofen, according to some research. This is the reason Mediterranean diets consistently show positive associations with cardiovascular health.

This bowl is medicine without tasting like it.

Storage and Freezing

Refrigerate in sealed containers for up to five days. The soup thickens considerably on cooling and may need water or stock when reheating — add gradually until the consistency returns to what you prefer.

To freeze: allow to cool completely. Freeze in portions for up to four months. Thaw overnight in the refrigerator and reheat gently, adding liquid as needed.

A Soup Worth Making in Volume

One of the small wisdoms of Italian home cooking is the batch-cook instinct — making more than you need today because you know tomorrow’s version will be better. This soup embodies that instinct entirely. Make a full pot. Share it if you can. Keep the rest.


Find more one-pot plant-based soups and vegan dinner ideas in our Website.